Screen protectors are vital in protecting your phone screen from damage, such as cracks and chips. It can be alarming if the screen protector’s sticky part is ineffective. Don’t worry. We have highlighted some effective tips you should follow to make the screen protector sticky again.
Remove the protector using a toothpick, gently lift it from the screen, remove dust using a dry microfiber cloth, apply the protector again after properly aligning it from the sides, use a dry cloth to press the screen protector so it gets properly attached, and lastly, apply special glue in the sides so that it doesn’t come out.
A leading cell phone repair services company like Wireless Waves Repair has a team of certified mobile repair specialists committed to delivering top-notch services.
So, without further waiting, let’s delve into this blog and discover some practical tips to make your screen protector sticky again.
Key Tips To Make The Screen Protector Sticky Again
Some of the effective tips to make the screen protector sticky again are as follows:
1. Remove The Protector First
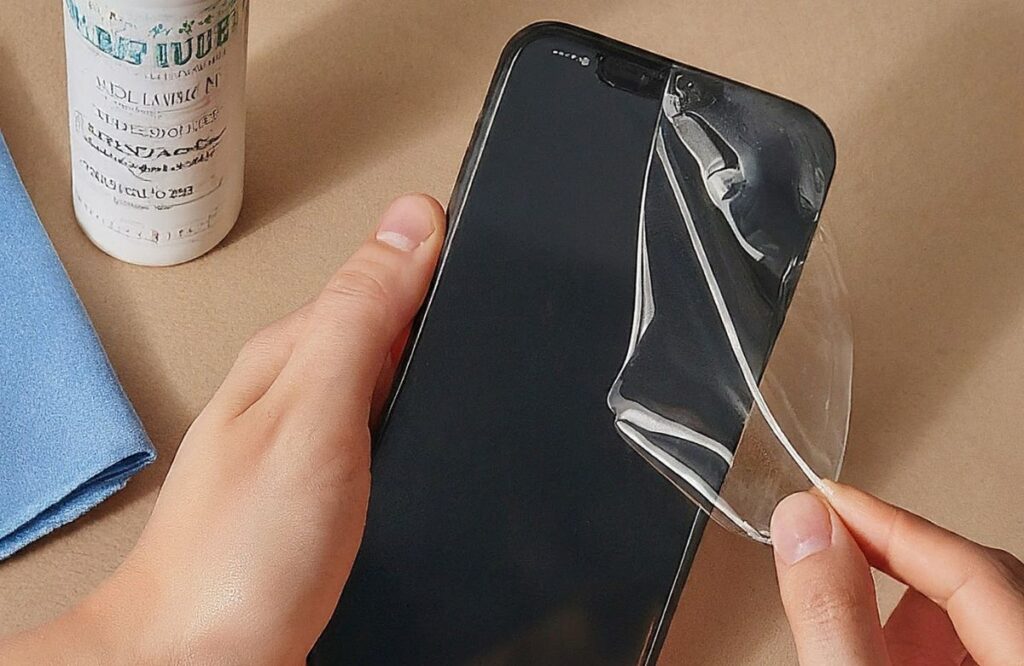
To re-stick your phone’s screen protector, you need to remove the glass protector first. To do that, you’ll need a toothpick. Avoid using sharp blades, as they can damage your screen protector.
2. Gently Lift The Screen
While using the toothpick, you should lift the screen protector gently. When the glass is up, you should move the toothpick deeper under the screen protector so it can come out from the edges.
3. Remove Dust
By removing dust and debris, you’ll be able to ensure that the screen has a clean and clear surface. Use a soft microfiber cloth to clean the screen properly after you remove the screen protector. You can also use a tissue to clean the phone screen.
4. Apply The Screen Protector Again
To attach the screen protector back to your phone, you should align the protector attach it from one edge, and gently attach it.
5. Use A Dry Cloth
After aligning and placing your screen protector, you can use a dry cloth to help it stick properly by gently pressing it.
6. Apply Special Glue
You can also use special glue on the edges of the screen protector to ensure its durability and that it doesn’t come off.
Why Are Screen Protectors Beneficial?
Screen protectors are one of the best ways to protect your phone screen damage. If you’re looking to avoid getting your phone screen cracked or chipped off due to an accidental fall, it is wise to take a strong preventive measure by buying a high-quality glass screen protector for your phone. You can save money and time by considering re-sticking your screen protector instead of buying a new one.
Final Thoughts
By following these key tips such as using a toothpick, gently lifting the screen, removing dust using a dry cloth, applying the protector again while aligning it properly, using a dry cloth to press the screen protector so it properly gets attached, and applying special glue, you can effectively make the screen protector sticky again and re-usable.
Lastly, if you’re looking for a reliable phone repair company for your needs, choose none other than Wireless Waves Repair.
Frequently Asked Questions
Can I re-stick a phone screen protector?
Yes. Re-sticking a glass screen protector can be time-consuming and challenging, but with the right steps, you can easily reapply it.
How long do screen protectors last?
A screen protector can last indefinitely, given that you are using it properly.
Are screen protectors really worth it?
Yes, screen protectors are one of the most effective ways to protect phone screens from getting cracked or chipped off.
Can I use tape to make my screen protector sticky again?
For temporary fixes, you can use tape to make your screen protector sticky again. However, this is a short-term solution that will compromise the aesthetics and integrity of your cell phone. Therefore, it is advised to clean the protector and re-apply it using special glue or replace it with a newer one.