Cleaning the MacBook is not a one-time activity because dust, debris, and grime can build up under keys. But don’t worry, you can do it easily. Start by turning off and unplugging the device. Debris should then be inspected before gently shaking and tapping upside down.
Use compressed air to blow out particles, and if the keys are stuck, remove them for further cleaning. Once you have cleaned the keys and the space under them, put them back in place and clean the surface before you test the keyboard’s functionality. If issues persist, it may be time for a MacBook Repair to ensure everything is working properly.
11 Steps To Clean a MacBook Keyboard Under Keys
Here are the cleaning steps you should take:
1. Power Down and Unplug Your MacBook
- The first step is to power down your MacBook.
- Once turned off, unplug your device from any power source.
- This will eliminate electrical interference while cleaning and prevent accidental key presses, which could send the system haywire or input unintended commands.
2. Inspect the Keyboard
Now that your MacBook is powered off, examine the keyboard.
- Look for collected debris, sticky keys, or discoloration.
- Focus on areas where crumbs, dust, or sticky keys are visible.
- This early inspection will help you organize your cleaning where you will dedicate more attention where it is most necessary.
3. Shake and Tap
- Now that you have inspected your keyboard, hold the MacBook upside down by about 75 degrees.
- Shake it gently to release loose particles.
- You may also tap on the opposite side lightly with your fingers, pushing the unwanted debris to fall free.
- This would dislodge crumbs and dust particles that are caught under the keys.
4. Use Compressed Air
- If tapping and shaking cannot clear all the debris, use compressed air.
- Hold the canister at a 45-degree angle. Do not hold it directly above the keyboard, as moisture can be released and damage the MacBook.
- Spray short bursts of air across the keyboard’s surface, working from one end to the other.
- This will dislodge the stubborn particles.
5. Remove the MacBook Keys
- If debris is still stuck under certain keys, you may have to remove them to ensure proper cleaning.
- You can use a plastic spudger or any flat object to remove the keys from a keyboard.
- Apply even pressure to avoid damaging the keycaps, butterfly mechanism, or scissor mechanism beneath.
Note: The process is quite different depending on the MacBook model. You should check the manual that came with your model or the support section of the Apple site.
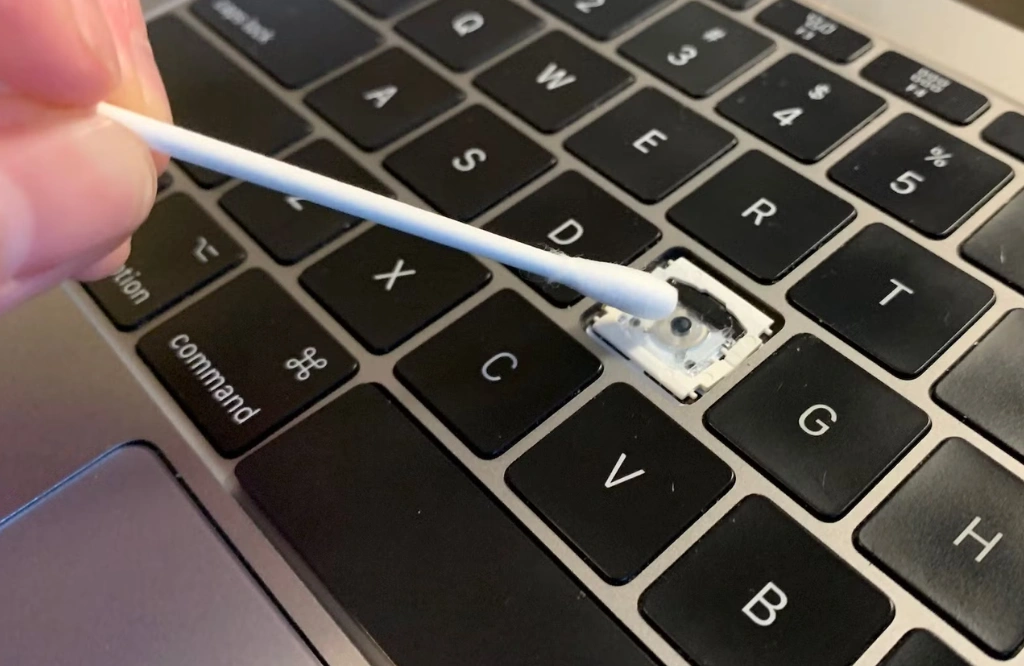
6. Clean Under the Keys
- Once the key has been removed, take time to clean underneath it.
- Next, use a cotton swab dipped in isopropyl alcohol to clean underneath each key.
- It is advisable not to wet the swab to prevent the liquid from seeping into the internal working parts of the keyboard.
- Also, tweezers should be used to remove large particles, such as hair or food particles, that may have stuck to the plates.
- Take care during this step to avoid damaging the keyboard’s internal parts.
7. Clean Between Keys
- Using an isopropyl alcohol-moistened cotton swab, clean deeper around the gap seams.
- While these steps will render access to certain regions impossible for people using old ways of cleaning:
- This cleaning action is so deep because isopropyl alcohol solubilizes grime while sanitizing the surface.
8. Clean Keycaps
If you have removed the keys, it is time to start cleaning your individual keycaps:
- Wipe off grime, oils, or residue with a microfiber cloth or other cotton swab saturated with isopropyl alcohol.
- It’s also easy to forget the top of the keycaps and their base, so clean that as well.
- Let them dry completely before proceeding.
- This will make sure no excess water gets in the keyboard when reinstalling.
9. Reattach Keys
- Align the keycaps with the respective mechanisms and press them back onto the keys after cleaning.
- Press them gently until you hear a click, and you will know they are secured.
- Test every key to ensure it is securely attached and working correctly.
- Proper alignment is key in keeping the mechanisms of the keyboard in good shape.
10. Wipe the Surface
- Clean the whole surface of the keyboard once everything is set back in place.
- Take a microfiber cloth and lightly dampen it with isopropyl alcohol.
- This last wipe will be the one removing smudges and fingerprints.
11. Perform a Final Check
- Turn on your MacBook and do your final keyboard test.
- Type a few sentences to ensure all keys are responsive and function properly.
- This last check is also important to ensure the clean-up is good.
7 Common Mistakes To Avoid When Cleaning Your MacBook Keyboard
Proper maintenance of your MacBook keyboard is essential to ensure longevity and performance. To ensure effective cleaning, avoid the following common mistakes:
- Using Excessive Liquid: Excessive cleaning solution can seep into the keyboard, causing potential internal damage.
- Applying Direct Spray: Spraying cleaners directly onto the keyboard increases the risk of moisture penetrating the keys. Instead, spray the cleaner onto a cloth first.
- Using Harsh Chemicals: Cleaners containing bleach or hydrogen peroxide can damage the keyboard’s finish. Choose mild solutions like 70% isopropyl alcohol.
- Neglecting to Power Off: Cleaning while the MacBook is on can lead to short circuits. Always shut down and unplug your device before cleaning.
- Using Abrasive Materials: Scrubbing with rough materials can scratch the keys. Use a soft, lint-free cloth for cleaning.
- Improper Use of Compressed Air: Holding the can too close or at an angle can introduce moisture. Maintain a proper distance and keep the can upright.
- Removing Keys Incorrectly: Prying off keys without proper knowledge can damage the mechanism. Consult official guidelines before attempting key removal.
Conclusion
Learning how to clean under the keys of your MacBook is essential for maintaining its functionality. Start by powering and unplugging your device to prevent electrical interference and accidental key presses. Then, gently shake and tap the MacBook to dislodge loose particles, and use compressed air or remove keys for thorough cleaning.
Avoid using excessive liquid, direct spray, harsh chemicals, abrasive materials, improper compressed air use, or incorrect key removal. By following these safe cleaning methods and consulting Wireless Waves Repair, you can ensure the optimal performance and longevity of your MacBook keyboard.